Receiving a Deposit on a Layaway
Applying Payments to Layaway
After you create your layaway in QuickBooks POS, you will then follow the next steps:
- Click the “Green Drop Down” button, in the top left corner, that says ‘I Want to’, Select ‘IA Layaways Order’ from the drop down area
- Click the last name of the customer, on the right side of the screen, of the Layaway you would like to take a deposit on. Then click the grey button, on the left side of the screen, that says “Take Deposit”.
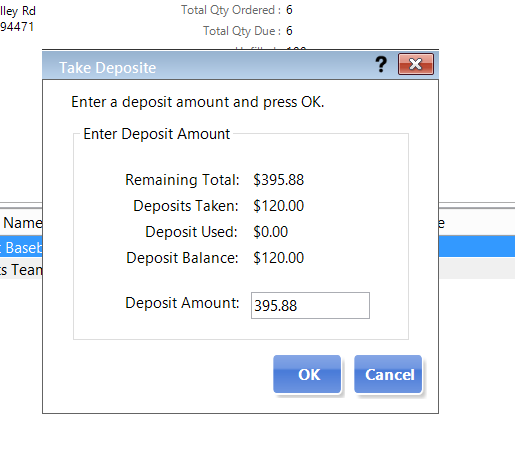
- A popup window opens up ‘Take Deposit’.
- Type in the deposit amount.
- Once you have verified that the amount was entered correctly, Click “OK”.
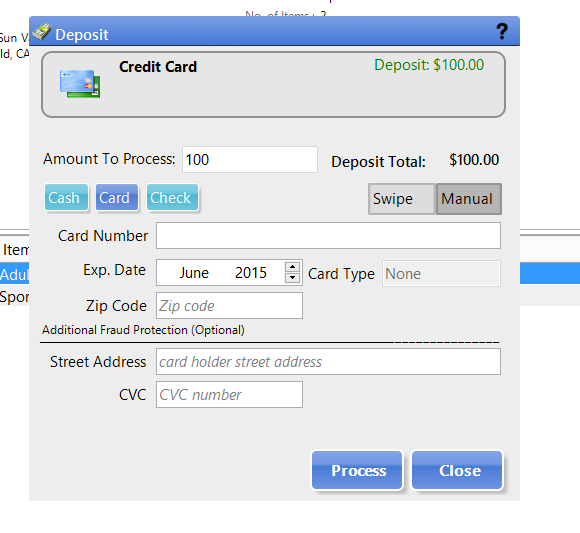
- Next, the popup window to process a Credit Card, Accept Cash or Accept a Check will open.
- At this point you can ‘Swipe or ‘Manually Enter’ in the customers payment information information.
- Make sure to ‘Click’ on the Payment Type.
Note: Once a payment type is chosen the button color will change to blue. - ‘Click’ whether you are Swiping a Card or Manually entering a card.
Note: The button you choose will change to a darker grey. - ‘Verify’ all information is entered correctly.
- Click ‘Process’.
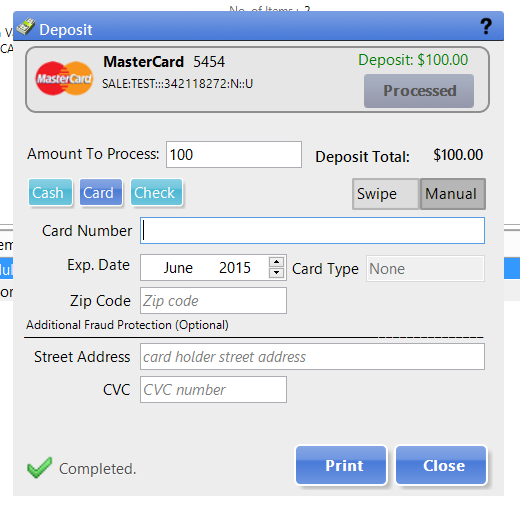
- When payment is processed “Successfully”, a green check mark with Completed in the bottom left corner will appear.
- Now you can click ‘Print’ to print a receipt or ‘Close’ to close out of the payment window.
- Close the Layaway list screen by “Clicking” the red X in the top right corner of the screen.
Instant AcceptDeposits, How Tos, Instant Accept Legacy, Instant Accept V1.0, Tips & TricksDeposits, Instant Accept POS Tutorials, Instant Accept POS Walkthroughs, Layaway, Point of Sale, Receiving a DepositNo Comments on Receiving a Deposit on a Layaway


